Regardless of what you’re grinding coffee with at home—whether it’s a burr grinder, blade grinder, or mortar and pestle—your grind size is arguably the most influential variable on how your coffee will taste. That’s why when it comes to dialing in a coffee, grind size is just about the only variable you should need to adjust. You may not know what “dialing in” a coffee is, but I think it’s safe to assume that you know what one tastes like.
It tastes like that cup you had at that café once that was right at the intersection of sweet and acidic—perfectly balanced on the set of sensory scales, not leaning towards sour on one side or severe on the other. Getting a coffee into that “sweet spot” as I like to call it, is the goal of every one of my brews. It’s in that spot where flavors like blueberry or strawberry get to burst through and memories of milk chocolate or baked pastries come to remembrance in a nostalgic sort of way.
In short, dialing in a coffee refers to the process of finding that sweet spot by balancing all the variables of brewing coffee. In my experience, grind size is the greatest contributing factor to that process, so let’s learn how to dial a coffee in on your grinder!
But first, a legend of terms:
- Boulders - large particles of ground coffee
- Fines - micro particles of ground coffee
- Under-extracted - sour or weak flavors (often the result of grinding too coarse)
- Over-extracted - astringent or drying flavors (often the result of grinding too fine)
To find the sweet spot for your specific coffee we first have to establish the two unpleasant ends of the flavor spectrum—under-extraction and over-extraction.
Under-extracted coffees find themselves on the left side of the spectrum and can often be described as tasting sour, vegetal, weak, and dull. This is often the result of grinding your coffee too coarse and not exposing enough of the coffee bean to the water you’re brewing with. The more surface area your water has a chance to come in contact with, the more flavor is able to be extracted.
On the other end of the spectrum is an over-extracted coffee, and this one is certainly my least favorite. These coffees are often described as being bitter, but I think they can be more accurately described as astringent, drying, and potent. This usually happens when coffee is ground too fine and the water has too much of an opportunity to extract flavors from the beans, extracting even the undesirable ones.
The sweet spot is found somewhere in the middle of this sensory spectrum, but it can often feel elusive. The path to flavor town is not always clear.
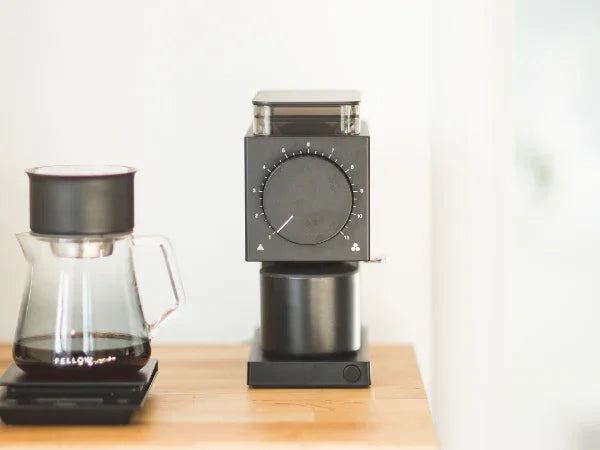
One Big Dial
If you’ve made it this far, you’re doing great! We’re about to learn how to get to our destination. On the front of the Ode Brew Grinder you won’t find much more than one large black dial because frankly, that’s just about all you need. By turning the dial you are changing the distance between the burrs and altering the size of the ground coffee. A quick aside on burrs: the 64 mm flat burrs in Ode do an exceptional job of producing an even grind size, helping you achieve even-extractions.
![Pouring coffee grinds into Stagg [X] Dripper](https://cdn.shopify.com/s/files/1/0057/6235/1219/files/ODE-11_1_480x480.jpg?v=1605793848)
Turn the dial to the left towards 1 and your grinds will be more fine. Turn it the opposite way towards 11 and you’ll be moving more coarse. So what’s the perfect grind size? Well, I’ve got some bad news—there isn’t one. You see, each coffee and each brew method are so unique that there isn’t a one-size-fits-all grind size.
That being said, here’s my rule of thumb for dialing in any coffee for any brew method: grind as fine as you can until you perceive astringency (drying sensation in your mouth or unpleasant bitterness) and then dial it back a notch or two. That will be the sweet spot on the grinder for that specific coffee.
Over time and only with experience you’ll begin to learn where a reasonable starting point is for any given coffee or brew method. For me, my dialing in process looks like brewing a single cup with a simple recipe I’m comfortable with at a grind size I at least know is in the ballpark. From there I let my taste guide my movements.
Do I think it’s under-extracted because I can taste sourness? I know what to do. Do I think it’s over-extracted because of how sharp it feels on my tongue? I know which direction to turn the dial.
Those sharp, drying flavors we’ve talked about come from too many fines of coffee in your brew bed. Inversely, too many boulders can result in those sour, vegetal tastes. Cheaper grinders often produce too many of both, resulting in a mixture of those unpleasant flavors no matter how long you’ve tried to dial in a coffee. Nobody likes an uneven-extraction.
That’s why when it comes to brewing the best coffee you can at home, investing in a great grinder will have the most measurable impact on your final cup. Ode Brew Grinder from Fellow does that job for me!

About The Author: Alexander Mills is a home brewer (just like you!) but he’s on a mission to help more people brew better coffee at home. Alexander and his wife Rebecca call Niagara Falls, Canada home but are almost always on the go. One of their favorite parts of travel is connecting with the local coffee culture in whatever city they find themselves in. When he’s in a cafe you’ll find a cortado in Alexander’s hand, a black filter coffee of any origin when he’s home, and an eclectic cocktail when it’s supper time!
Photography by Alexander Mills
How to Use an Espresso Dial-In Chart
If you love espresso and want to pull a delicious espresso shot, an espresso dial-in chart can help you find exactly the right blend that tastes delicious and gives you a boost. An espresso dial-in chart uses three parameters — dose, yield and brew time — to maximize flavor.
The Dose
The dose refers to the number of grams of dry coffee you use to make your shot of espresso. You have to experiment because amounts can change with darker roasts and lighter roasts, different coffee processing methods, blends vs single origins, and so on. Use the chart to find a starting point, and taste-test your way to perfection.
The Yield
The yield is the total amount in volume of liquid out after pulling your espresso shot. A higher yield means higher volume but generally less viscous espresso. Again, the chart can give you a starting point, so you get the perfect ratio of water to coffee.
The Pull Time (aka “Shot Time”)
Finally, pull time or “shot time” refers to the number of seconds you brew (or “pull”) your espresso. The fineness of the grind produced by your Opus grinder plays a role here as a finer grind pulls a little longer to extract more from the coffee if your espresso tastes a little weak or sour. On the other hand, a coarser grind will help you extract a little less from the coffee if your espresso tastes a bit too heavy or bitter.